If you have questions, please feel free to ask by reaching us at
Quicklinks
- docking/charging/others
RNS Features
Seirios RNS is a visually rich product that combines modern web and robotic technologies. The following highlight features for your various use and applications
Seirios RNS accessed on a tablet's browser
Seirios RNS' features can be divided into three categories:
Core Features:features that enable the robot to move manually and/or autonomously
Supplementary Features: features that supplement and improve the core features
: features that non visual and only configurable from the robotic backend
Dashboard
After logging into Seirios RNS, you will see the Dashboard first
The dashboard is the first page that you see after logging in. After mapping, saving and loading a map, it will be visualised here;
Speed controls, analog/keyboard control and toggle, and mode-dependent buttons will be displayed in this panel. This panel can be toggled to be hidden or shown too.
Depending on the mode selected, action buttons will change
Note that E-stop will disconnect power to the motors and will render the robot immovable. To abort/clear tasks in the queue, choose Clear tasks instead
Core
Seirios RNS' core features
The following features are bundled with the following features.
Please refer to the respective features' page for additional details, images and information by referring to the menu on the left or by clicking the hyperlinks below.
If you're an existing client, please refer to this form to submit URLs to your required pre-installation videos and images
(0.5/4) Before Starting Robot Checks
Ensure robot is moving linearly at the right speed
Before starting Robot checks:
Kill all Movel nodes (if you already have it previously installed)
Launch only the motor controller and the teleoperation keyboard twist for testing
[OR]
Run the following command:
rostopic pub -r 10 /cmd_vel - for linear linear: x-0.1 for rotation only : angular: z-0.1
Robotics
Besides intuitive features on the interface, Seirios RNS brings key robotic capabilities that are not apparent on the user interface but silently powering and enabling robots to move in challenging environments
Please visit the following articles for more information:
The content of this page might experience frequent changes as we are going major product renovations. Stay tuned!
FMS management features include the following (pages coming soon):
User and role management
Organisations
Robot analytics
Key and licence manager (only for self-hosted)
Starting Seirios
After restarting the PC/machine, Seirios will automatically start every time the machine powers up.
To start Seirios manually, open a Terminal and enter your workspace by running the command cd ~/catkin_ws/movel_ai
Run docker-compose up to start the docker containers for Seirios (output will be shown in the terminal)
Run docker-compose up -d to start Seirios in the background (no output will be shown in the terminal)
To stop Seirios, go into the terminal where Seirios is currently running, and use Ctrl+C(if you run by using docker-compose up) OR run docker-compose down in another terminal with the same directory. This will lead to the Docker containers being stopped.
To check for docker containers running at any point of time, run docker ps.
If Seirios is up and running, you should expect to see the different containers of Seirios components being displayed. Otherwise, it should yield an empty table.
You can also check the version of Seirios by using docker ps.
Use either the analog controller or WASD keys to align the green laser scan to the map's walls and environment
Stations
Create multiple stations for either to dock for charging, or for other purposes
Users can create one or more (no limit) stations for a specific map to dock to - for charging or for other tasks (such as picking of objects with a robotic arm payload)
Creating stations
Users are required to drive the robot manually in the map (in the interest of accuracy and precision) and upon reaching the point of interest, capture the pose and store it as a station
For docking, ensure that the QR code is visible to the robot before saving it as a station
Queueing saved stations
After station(s) are created, queue them together with other tasks to build an autonomous robotic process in your environment.
Besides charging, stations can be used to mark points of interest so robot(s) can dock to, with precision
Please refer to the on how to integrate your own docking code
RNS Plugin Installation Guide
Supported Platforms
Platform
x86_64 / amd64
arm64 / aarch64
s390x
Hardware Requirements
RNS Plugin doesn't perform any heavy computation as it only acts as an adapter or a communication bridge between FMS and RNS. You can safely run RNS Plugin inside your robot without any significant performance cost.
Required Ports
Please ensure that the ports below are allowed in the robot's machine to ensure that communication with FMS is working properly.
Protocol
Direction
Port Range
Purpose
Licensing
RNS Plugin doesn't require a license as it's only an adapter between FMS and RNS.
Core Features
The content of this page might experience frequent changes as we are going major product renovations. Stay tuned!
FMS' core features can be categorised into basic and advanced features.
Basic Features
Basic features are the minimum set of features needed to work with FMS:
Dashboard:
Teleoperation
Mapping
Localiser
Advanced Features
Advanced features are features that enable users to make use of the full potential of RNS. These include:
Fleets
Custom task and Aux task
Task list
Task scheduling
Map Editor
Different users may have different use cases to edit a map. With the map editor feature, users are able to;
Annotate - name an area
Create no-go zones (where robots will not be able to navigate into/to)
Yes-go zones (where users are able to 'clear' obstacles formed during the mapping process or to undo no-go zones)
Users can access the map editor by clicking this icon
Users will be presented with a set of options to edit the map;
Options are categorised by shapes - where users are able to choose whether to Annotate/Name, create No-go zones, and Yes-Go Zones. These categories are 'Squares', 'Polygon' and 'Others' (single lines)
A single line as an option can be used to create precise and thin obstacles such as walls
Installing docker
The goal of Part 1 of the installation is to install Docker and it’s dependencies
In the same directory in the Terminal, run the command bash install-1-docker.sh
Wait for the installation to complete
Then we move to the last part to install Seirios-RNS.
Technical Resources
Technical Resources relating to the FMS:
Interface Related
What are the supported devices or minimum resolutions
To view the user interface of Seirios RNS, enter or <IPaddress>:4000 in your browser of choice
Teleoperation
Under this category, users can manually drive their robots
Drive - to manually drive the robot with the onboard controls (keyboard or analog)
Granular controls are automatically applied; similar to a car's gas pedal/accelerator, users can granularly control the speed based on the set (0.1 - 0.9 m/s) limit with the joystick.
Installing Seirios RNS
The goal of Part 2 of the installation is to install Seirios, prepare the catkin_ws, and create the appropriate docker-compose.yaml file.
In the same directory in Terminal, run the command bash install-2-seirios.sh
(2/4) Angular Speed Calibration Check
Angular speed calibration check - Test using pub /cmd_vel for accurate result
Check the angular speed for at least 0.1-0.6 rad/s, and check whether the robot rotates correctly. A video recording is encouraged to troubleshoot any issues that may arise.
Likewise, repeat the same method to check angular speed calibration.
Before downloading or installing Seirios RNS, it's important to check the following (hardware and software) to ensure errors do not compound during or after installation
If you're an existing client, please refer to submit URLs to your required pre-installation videos and images
REST APIs
Seirios RNS comes with REST APIs for you to utilize - for integration and advanced deployments. To view the list of APIs available:
Please enter <IPaddress>:8000/api-docs/swagger on your robot/PC.
Alternatively, please download this pdf to explore available APIs ⬇️
Hardware Related
What types of robot bases/AGVs do you support?
Seirios supports Differential, Omnidirectional or Ackermann drives. For Ackermann steering, users are required to input a radius value in the Settings section;
Kerb-and-ramp navigation
Seirios RNS is able to navigate on uneven and rough terrains - conditions that will usually throw localisation off due to the tilt and different FOV angles when robots are on an inclined/downward position
These environments also include environments with kerbs and ramps - often seen in everyday public places.
Current inclination supported : ∠15°
Case study : WSS
Station
Simple tasks: Waypoints and Trails
Robot management
Maps management
Navigation graph
Analytics
Set angular x value between 0.1-0.6. Leave the other values as 0.0.
Measure how much the robot turns. And similarly, record the time it took to turn.
Check that your calculations match the value you set for angular z.
Alternatively, you may use rosrun telelop_twist_keyboard teleop_twist_keyboard.py. Set angular speed between 0.1-0.5. Then repeat Steps 3 - 5 above.
Validating Odometry Data
We provide you with a script that enables you to verify the odometry data by inputting the velocity and duration. The robot will then move at the specified velocity for the given duration. Subsequently, the script will calculate and provide the distance traveled by the robot based on these inputs.
This will facilitate the verification of your odometry data, making it easier and more efficient for you.
The radius value is your robot's turning radius in meters
Does Seirios support line-following navigation?
Integration is possible; however, as localization is not done via Seirios (SLAM), there will be no map and therefore most features will not be accessible or usable.
Seirios RNS supports multiple mapping algorithms. Jump to the algorithm of interest here on the right panel (desktop view only) ➡️
Please be informed that all mapping modes (except 2D mapping) are disabled by default as they require special hardware configurations. These include Automatic mapping, 3D mapping, RTAB mapping and ORB-SLAM mapping and are indicated with flags 🚩 below
2D Mapping
The most commonly used mapping algorithm, the cameras mounted on robots populate and generate a map of its surroundings
Users can manually teleoperate the robot, to 'reveal' the map represented by white areas in the map
Auto Mapping 🚩
Incorporating this feature into Seirios allows users to automatically map large areas without manually driving with virtual controls. The auto-mapping feature was originally developed for a wall-scanning construction project
Automatic mapping without manual controls from users
Map does not save automatically once mapping is done. Click 'Stop' to prompt the 'save map' model
3D Mapping 🚩
3D mapping requires a 3D LiDAR and a capable CPU (Intel/AMD x86 recommended)
For higher accuracy, range and better visual representation of environmental features, users can opt to map in 3D. A 2D map will be generated from a 3D map too
RTAB-MAP 🚩
RTAB-Map (Real-Time Appearance-Based Mapping) is a RGB-D, Stereo and Lidar Graph-Based SLAM approach based on an incremental appearance-based loop closure detector.
As its namesake, it uses real time images to map the environment
ORB-SLAM Camera Based Mapping 🚩
ORB-SLAM is a keyframe and feature-based Monocular SLAM. It operates in real-time in large environments, being able to close loops and perform camera relocalisation from very different viewpoints.
Seirios is able to support mapping with the use of monocular, stereo, and RGB-D cameras. Green 'dots' are features recognised and stored in the map data, generating a 2D map
Substitutable with similar cameras with depth sensing capabilities
Behavioral & Interface
Customisations can be made via Settings
The Settings modal can be shown by clicking on the top left menu icon. Here you will find the following settings;
Robot Customisations
Human Detection
When enabled, robots will stop moving when humans are detected. Custom auxiliary commands (such as turning off the UV light) can be pre-programmed. Used for specific use-cases, the human detection usually leads to certain behaviours. For example;
When a UV disinfection robot detects a human, the UV lights will be disabled to prevent harm unto the detected human
Stop-at-Obstacle
When faced with obstacles, the robot will not attempt to plan around the obstacle for safety reasons.
This is particularly useful when the environment is tight or with fragile objects; robots will not keep reattempting to navigate (forward, backward, forward...) but wait for human intervention.
Teleoperation Safety
In teleoperation mode, robots will still stop if faced with obstacles.
As robots are not always in human users' view, robots will automatically stop when faced with obstacles even in manual / Teleoperation mode. This may present unintended behaviours to the robot to the user therefore an option for users to turn off or on
Battery Threshold
Set a battery percentage (in %) and the robot will automatically navigate back to home and dock (if available) when the battery level falls under the set percentage.
When at Home and charging, if users intend to disconnect the robot, a modal will warn and prompt the user this battery fallback toggle to be disabled - as the robot will keep re-attempting to return to home to charge
Account Management
To ensure only authorised staff are allowed to connect and operate the robot, users are able to create new credentials to provide access with end users or staff.
The user management feature is currently being revamped. Please expect an update soon
Language Switcher
Presently, only Chinese (Traditional and Simplified) are supported officially as an extra language in Seirios RNS.
For additional languages, please use your browser's translator (Google Translate for Chrome) in the meantime.
Appearance
Users using Seirios in different environments and conditions have the option to switch between dark and light mode - under Settings
Health Care
Errors are logged and displayed here under 'Health Care'
Software Checks
For seamless integration with Seirios RNS, it is important to set up some key robotics software and drivers in your robot system. The following is a checklist of things that Seirios RNS requires your robot system to have before Seirios is installed:
TF for base_link to scan:
Ensure that there is a direct tf link between the base_link frame and the laser frame as it is required by Seirios RNS
(3/4) Odometry Check
Ensure odometry is working well
Linear check
Align the bot appropriately to test 3-4 meters of linear, straight distance without an angular component. Test using the following command in Terminal: rostopic pub /cmd_vel geometry_msgs/Twist "linear: x: 0.0 y: 0.0 z: 0.0 angular: x: 0.0 y: 0.0 z: 0.0"
Restart motor
Check odom pose is zero.
Publish only linear vel x: 0.1 and stop the bot at the 3-4 m mark.
Echo the odom topic: rostopic echo /odom.
Compare the pose of the updated odom with linear and angular bot travelled (offset 1-2%).
Angular check
Align the bot properly. Mark the spot where the bot will begin rotating.
Restart the motors.
Rotate the bot clockwise. Quaternion should be updated to negative.
Validating Odometry Data
We provide you with a script that enables you to verify the odometry data by inputting the velocity and duration. The robot will then move at the specified velocity for the given duration. Subsequently, the script will calculate and provide the distance traveled by the robot based on these inputs.
This will facilitate the verification of your odometry data, making it easier and more efficient for you.
You can download the script .
Windows
Installation Steps
Before you start installing FMS, it's important to note that the current main method of installing FMS is by using Docker. You'll need to install docker on your own or use our installation script.
Download the latest FMS Easy Deploy version and unzip/extract the folder to a preferred directory
FMS Easy Deploy contains the installation scripts and will also act as the working space for the FMS installation.
Install docker on the host machine
For windows version, please install the from the Official Docker Website. Note that this will also require installing WSL2.
Run the installation script
After installing docker desktop, you can navigate to the FMS Easy Deploy directory and go to fms_easy_deploy/fms/windows/ which will contain all the necessary batch scripts. You can then just click the install.bat to run the installation batch script which will pull the Official FMS Docker Images.
Start the containers
In order to start FMS, you can use the start script (start.bat) which will load the environment variables and run the containers based on the docker compose file.
You can also use the stop script (stop.bat) to stop the docker containers easily.
Uninstalling FMS
If you want to uninstall FMS which involves removing docker images and volumes. We provide a convenience script uninstall.bat
Ubuntu
Installation Steps
Before you start installing the RNS Plugin, it's important to note that the current main method of installing RNS Plugin is by using Docker. You'll need to install docker on your own or use our installation script.
Download the latest FMS Easy Deploy version and unzip/extract the folder to a preferred directory
FMS Easy Deploy contains the installation scripts and will also act as the working space for the RNS Plugin installation.
Install docker on the host machine
You can install docker on your own by following the guide from the official website, or you can also install docker by using our docker installation script from the fms easy deploy directory:
Run the installation script
After installing docker, we can proceed with the installation process which mainly involves pulling the official RNS Plugin docker image.
Start the containers
In order to start the RNS Plugin, you can use the start script which will load the environment variables and run the containers based on the docker compose file.
You can also use the stop script to stop the docker containers easily.
Uninstalling RNS Plugin
If you want to uninstall RNS Plugin which involves removing docker images and volumes. We provide a convenience script:
Robot Checks
Seirios is designed to work with robots of all shapes and sizes.
However, checking that the robot is working correctly before software installation is crucial to preventing compounding errors.
Robot Checks:
(1/4) Linear Speed Calibration Check
Ensure robot is moving linearly at the right speed
A minimum speed of 0.1 - 0.5 m/s needs to be tested. Also, manually check if the robot covers the distance correctly. A video recording is encouraged to troubleshoot any issues that may arise.
Open a new terminal window. Execute this command: rostopic pub /cmd_vel geometry_msgs/Twist "linear: x: 0.0 y: 0.0 z: 0.0 angular: x: 0.0 y: 0.0 z: 0.0"
Change the linear: x: to 0.1-0.5 as we only want to move the robot straightly forward. Leave all the other values to 0.0.
Measure the distance the robot moved. And record the time between when the robot started to move and when the robot stopped. Calculate speed by dividing the distance over time.
Check whether your calculated speed matches up to the value that you have given for linear x.
If not, please recalibrate your wheels.
Alternatively, you may use rosrun telelop_twist_keyboard teleop_twist_keyboard.py. Similarly, give it a linear speed between 0.1-0.5. Then repeat Steps 3 - 5 above.
Note:
If your robot is non-holonomic, it shouldn't be able to slide sideways. y should be 0.0.
If your robot is not flight-capable, z should be 0.0.
Validating Odometry Data
We provide you with a script that enables you to verify the odometry data by inputting the velocity and duration. The robot will then move at the specified velocity for the given duration. Subsequently, the script will calculate and provide the distance traveled by the robot based on these inputs.
This will facilitate the verification of your odometry data, making it easier and more efficient for you.
You can download the script .
Navigation Tuning
Taking the node “/motors_ctrl” as an example. It is publishing to “/odom” topic with “nav_msgs/Odometry” message type, along with the other topics in the list. It also subscribes to “/cmd_vel” topic with message type “geometry_msgs/Twist”
Go into the folder ‘/home/<user>/catkin_ws/movel_ai/config/movel/config/’
In the parameter file costmap_common_params.yaml, ensure that the robot footprint is defined correctly.
If the robot footprint is a polygon, configure the footprint parameter and comment out robot_radius. For example:
Here, the robot has a square footprint with the xy coordinates of the four corners as shown, while robot_radius is commented out.
If the robot footprint is circular, configure the robot_radius parameter and comment out footprint. For example:
In base_local_planner_params.yaml:
Go to “#Robot” section. To tune the speed of the robot, configure max_vel_x for linear speed, and max_vel_theta for angular speed.
If the autonomous navigation motion is jerky, go to “catkin_ws/movel_ai/config/cmd_vel_mux/config”, find cmd_vel_mux.yaml, and increase the value set for timeout_autonomous.
For in depth tuning of base_local_planner_params.yaml, refer to .
Full Licence Activation
Skip this step if you are only evaluating Seirios RNS on a trial license
To view the remainder of the days left of your trial license, enter localhost:1947in your browser of choice
The Seirios RNS license is specific to the individual PC/robot that you are installing it on. The license that has been activated cannot be transferred and used on another machine.
Retrieve the c2v file
Generate your fingerprint of the PC by executing this command:
cd ~/catkin_ws/movel_ai/license/./hasp_update_34404 f hasp_34404.c2v (x86)
./hasp_update_34404_arm64 f hasp_34404.c2v (arm64)
Task Manager
For autonomous operations, use the Task Manager to queue different tasks together and introduce different elements such as Delays and Stations
From the top left corner, click the hamburger menu button to expand the options and click on Task Manager. You will be presented with two options, Tasklist and Scheduler.
These two options share many similarities but Scheduler introduces the element of time on top of queued tasks.
Queueing Tasks
From here, select Tasks (Path, Goal, Zone, Station, Custom or Delay) to create a list of tasks that can be run with a single click.
After saving the list, your tasks can be previewed as shown below
From here, run your Tasks now by clicking 'Run Now' or put this Tasklist into the queue with 'Add to Queue' at the bottom of the screen
Scheduling Tasks
To schedule these tasks to run at a later date/time, edit the task (by clicking the pencil icon) and input the date and time details
You can also save these scheduled tasklists as Active or Inactive
State Machines
Seirios supports integration with state machines. is tried and tested to be compatible with Seirios and it includes an editor with which you can create your own conditions;
Anti-shin buster
This prevents unintended collisions into the shins/legs of human users or other 'thin' obstacles, this is enabled by default in Seirios
(example) of how the robots views 'thin' obstacles to prevent collision
Technical Resources
Technical Resources relating to the Seirios Software:
We also have made our Seirios Manual Book available for download by clicking .
Import Multiple Stations to Seirios RNS from Excel File
Seirios RNS Feature Documentation: Bulk Station Management
Seirios RNS (Robot Navigation Software) introduces a powerful feature that significantly enhances the efficiency of defining navigation stations for robots. This document covers the steps to utilize the new bulk station management feature, which allows users to import station details from an Excel file. This feature can create or update over 500+ stations in a matter of seconds, a significant improvement over the manual method. The feature is available from version 4.30.1 for both Frontend and Backend.
Feature Summary
The bulk station management feature enables users to define multiple stations simultaneously by importing data from an Excel file. This reduces the manual effort required to set stations one by one, which can be time-consuming and prone to error.
Benefits
'Easy-deploy' for Seirios
Installation is easy with simple commands on the command line interface. Before you start, please ensure your system has both Ubuntu and ROS installed. Recommended;
In this page we will define the concepts used in FMS and how the objects in FMS are organised.
Project
FMS objects are organized in projects. A project can be thought of as a workspace in which users can operate and control multiple robots. It can contain multiple connected maps and multiple robots with various types. In practice, a project can cover a whole building, for example a whole warehouse with multiple floors and/or rooms.
A project is owned by a single user or an organisation. However, multiple users can be a member of the same project. A project is in many ways analogous to a repository in Git-based VCS platform such as Github or Gitlab, while the FMS can be analogised as "the Github".
Non-Fully Qualified Tasks
There are two types of Non-Fully Qualified Tasks, Auxiliary Tasks, and Custom Tasks.
Auxiliary Tasks
Auxiliary tasks are executables such as lights, music, sound, or others*.
They are created and executed independently.
Getting Started
In order to start integrating your robot into FMS, you'll need to create a Robot Pluginwhich acts as the communication bridge between your robot and FMS.
It's also important to note that FMS is designed to be software agnostic, meaning that our system and APIs are not tied to a specific robot system. In general, most robot systems should be compatible with our APIs.
A robot plugin can run as a standalone program or it can run alongside as a process in your robot system. As long as it is able to send and receive data from or to the FMS, then it can be classified as a robot plugin.
FMS has built-in support for Seirios RNS, you don't to create an additional robot plugin if you're already using it.
You can check this article on how to enable the FMS Mode from Seirios RNS.
Generally, you will need to do these three steps to create a functional robot plugin:
Device Minimum Resolutions
To view the user interface of Seirios Simple, enter or <IPaddress>:5000 in your browser of choice
Device Type
Recommended Devices
Minimum Screen Size (W x L)
Orientation
Robot Integration Manual
This manual is intended to give you a complete guide on how to integrate your robot into FMS. You can explore the following guides below:
If you prefer a hands-on approach, we also have on integrating the Turtlebot3 Simulation Robot into FMS.
FAQs
The following subpages are categories of frequently asked questions on Seirios.
There are 4 categories of questions;
Ubuntu
Installation Steps
Before you start installing FMS, it's important to note that the current main method of installing FMS is by using Docker. You'll need to install docker on your own or use our installation script.
Download the latest version and unzip/extract the folder to a preferred directory
You will see the new c2v file on the /home/<USER>/catkin_ws/movel_ai/license/hasp_34404.c2v
c2v (customer-to-vendor) is a fingerprint of your PC/robot that Movel AI requires to generate a licensed product
Send a c2v file to [email protected]or your Movel AI representative to request the license activation
Movel AI will send a v2c file with installation instructions
Send Movel AI the updated c2v file with the license activated
Keep the v2c and c2v files safe for future reference with Movel AI
- Efficiency: Import over 500+ stations in a few seconds.
- Accuracy: Reduces human errors associated with manual data entry.
- Convenience: Manage station updates and deletions through a simple Excel interface.
Setup Instructions
1. Preparation of Files
- Download Scripts and Template File: Begin by downloading the scripts `create_multiple_station_script.py` and `delete_multiple_station_script.py` here. Prepare an Excel file named `updated_station_list.xlsx` containing 5 columns:
- station_name
- station_id: Leave this column blank; it will be automatically populated or updated when the scripts are run.
- position_x: X-coordinate of the station in meters.
- position_y: Y-coordinate of the station in meters.
- File Location: Copy all three files (`create_multiple_station_script.py`, `delete_multiple_station_script.py`, `updated_station_list.xlsx`) to `~/catkin_ws/movel_ai/config`.
2. Editing the Station List
- Add new rows to define new stations in the `updated_station_list.xlsx` file. Fill in details except for the `station_id` as it is handled by the script.
- To update existing stations, modify the `station_name`, `position_x`, and `orientation_theta` fields as needed. Do not alter the `station_id`.
- Important: Save and close the Excel file to ensure the `station_id` gets updated correctly.
Execution Instructions
Running the Scripts
1. Access Terminal: Open your terminal and run the following command to access the Docker container running Seirios RNS:
docker exec -it seirios-ros bash
2. Navigate to the Configuration Directory:
cd /home/movel/.config/movel/config/
3. Create or Update Stations:
python3 create_multiple_station_script.py
4. Delete Stations (if necessary):
python3 delete_multiple_station_script.py
5. Refresh the UI: Refresh the user interface to view and verify the changes made to the stations.
Support
For further assistance or queries regarding the bulk station management feature, please contact our support team at [email protected] or visit our support page .
This feature is designed to streamline your robotic navigation setup and updates, making process management more efficient and less labor-intensive. For optimal use, ensure that all instructions are correctly followed and that the file and column names are kept consistent as specified.
Decide which capabilities you want to integrate from your robot to FMS
FMS is packed with many features and you might find that you don't need all the available features. You can specifically pick features that you want your robot to be able to perform from the perspective of FMS. This concept is called Capabilities and it can help you save time when you are creating your robot plugin.
For example, if your robot is able to perform navigation task by sending a Goal Point but it is not able to Teleoperate manually. You can specify that when you're initializing your plugin and those capabilities will be reflected later in the FMS UI. In this case, the teleoperation joystick will not be shown for the respective robot.
You can integrate your robot with FMS in two ways:
(a) Use the FMS Robot SDK, currently only supported in Python and soon Node.js.
(b) Manually integrate to the FMS Robot API by interacting with our HTTP and MQTT APIs.
You can read more about the integration process with FMS Robot API here.
Deploy and run your robot plugin
After you've finished writing your robot plugin, then you can run it either as a binary or as a docker container. As mentioned in the beginning of the article, there are no specific approach on how to deploy the robot plugin.
For best practices on the deployment, you can check the article here.
iPad mini or above
768 x 1024
Portrait & Landscape
Mobile
iPhone 8 or above
375 x 667
Portrait
Restart the motor and rotate the bot anticlockwise. Quaternion should be updated to positive.
Restart the motor. Rotate and stop the bot at the original marked spot.
Make sure that the angular pose is a 0 rad change.
If the robot is not reaching the max speed, increase acc_lim_x and acc_lim_theta.
In footprint_model, select a suitable model type and configure the corresponding parameters.
In “#Obstacles” section, tune the value of min_obstacle_dist to set how far away the robot should keep away from obstacles. Reduce this parameter value if the robot is required to go through narrow spaces.
FMS Easy Deploy contains the installation scripts and will also act as the working space for the FMS installation.
Install docker on the host machine
You can install docker on your own by following the guide from the official website, or you can also install docker by using our docker installation script from the fms easy deploy directory:
Run the installation script
After installing docker, we can proceed with the installation process which mainly involves pulling the official FMS docker images.
Start the containers
In order to start FMS, you can use the start script which will load the environment variables and run the containers based on the docker compose file.
You can also use the stop script to stop the docker containers easily.
Uninstalling FMS
If you want to uninstall FMS which involves removing docker images and volumes. We provide a convenience script:
Ensure that the lidar is publishing a 2D scan to /scan topic
Example of TF Tree from rqt_tf_tree
Direct Link/TF from base_link to laser is required
RVIZ TF Display Status (All Are OK, No Warnings)
Step 1
The easy-deploy package can be obtained from our Movel AI representative or can be downloaded from the following mirrors. Please ensure the right mirror for the right architecture (arm64 or x86 is selected)
Follow the instructions on the following pages to completely install Seirios RNS:
Google Drive Link
Mirror (Terabox)
arm64 (currently unavailable)
x86_64 (currently unavailable)
A trial license of 15 days is included in this easy-deploy package. Tuning of your robot parameters and configuration is required after installation. Please contact your Movel AI representative or email [email protected] for support and assistance.
Custom features such as docking to charging stations are not included as it is a custom feature that requires development and integration. If you have a docking /custom feature code, please refer to this link for integration
Move the easy-deploy zip file to your home directory /home/<USER> and extract the zip using the Archive Manager (<USER> refers to the account username).
Extract/Unzip Easy Deploy package
Extract/Unzip Easy Deploy package
Files in the Easy Deploy package
Step 2
Now, we need to run the installation in a Terminal
Right-click in the file explorer and open a Terminal in the extracted easy-deploy folder/directory
“Open in Terminal” for extracted easy deploy folder
Directory easy-deploy in Terminal
Then we move to the next part to install docker.
A project contains all the things necessary to operate robots in an environment and it is independent from any other project. The following are entities under a project:
Robots
Maps
Tasks
This organisation means that the three objects above are unique to a project and they only exist within the scope of a project.
Robot
A user who is a member of a project can control and operate robots in the project. A robot is owned by a project and it cannot exist in more than one projects simultaneously.
A user can do the following actions on a robot:
Teleoperate
Create map
Localise
Send a command (task, cancel, pause, resume)
Modify its parameters
Overview page of a robot
A robot has a few properties. Three important properties of a robot are Robot Type, Plugin Type, and Robot Token.
A robot connected to FMS has a robot type. A user can create a robot type within a project and categorise robots into a type to differentiate robots with different functions or characteristics.
When the robot connects to FMS, FMS automatically detects the plugin type. This plugin type is used to determine certain payloads and messages which will be relevant if a user wants to use special tasks such as custom tasks and aux tasks.
Robot token is used as the identifier of a robot. This token is unique for every robot and is generated when the user creates a new robot.
Map
Map represents the physical environment in which the robots operate. Other objects such as robots and (most) tasks are located somewhere on a map. In a project, map is stored in Library.
Library page of a project
A user can do the following actions on a map:
Import a map
Create a map with a robot
Edit a map (add zones, navigation graph)
Connect two maps
Task
A task is an action that can be done by a robot. In general, a task involves a robot to navigate to a certain point on a map. Similar to RNS, there are two basic tasks in FMS: waypoint and trail. There are also custom task and auxiliary task in FMS, though these concepts are slightly different than those of RNS.
Dashboard page of a project
They must be 'stacked' on top of fully qualified tasks and will be executed together at the specified time and sequence
Ensure you have the necessary information to create aux tasks
You can fill name for the Aux Task Name, then there are 3 Types that you can choose.
1. RoslaunchFile: You can launch your aux task using the roslaunch file, please fill the LaunchFile as thefull path of the launch file that you want to launch.
2. Rosnode: You can launch your aux task by calling the rosnode, please fill the Pkg as the package of the rosnode, and Executable as the executable file. It will similar to this:
rosrun <Package> <Executable>
3. Executable Scripts <recommended>: You can launch the aux task by executing the executable scripts, please fill the Executable as the full path of the script file, and also you can add the arguments as well (optional). It will similar to this:
bash ./script.sh arg
How to run it:
Copy your bash script to the ~/catkin_ws/movel_ai/aux_task folder.
This is the example of script for your reference, you can modify it based on your case.
#!/bin/bash
function proc_start { rostopic pub /aux_task_status std_msgs/String "data: 'start'"
Make sure you make the script as executable (sudo chmod +x [file_name].sh)
Create new aux task, executable must be /home/movel/.config/movel/aux_tasks/[file_name].sh (full path directory for auxiliary task inside Seirios-RNS Docker)
args is optional, you can leave it blank
Custom Tasks
Custom tasks are tasks that move robots - such as docking or picking with a robotic arm. These movements are programmed as custom tasks and can be chained with other tasks to create a fully autonomous robotic operation.
RTABMAP is a mapping algorithm which produces the same 2D map with scan
Intel RealSense D435 - a depth camera that can be used for ORBSLAM camera based mapping
There are three types of users ; Owner, Admin and Staff
Simplified and Traditional Chinese are supported officially
Light mode
Dark mode
Hardware errors are also shown here, if any
Tasks
Single event tasks are tasks that can be executed with one click
Trails and Waypoints are Single event tasks
There are only two types of tasks in Seirios RNS;
Trail : where robot will follow the generated lines closely (will not deviate outside). When faced with obstacles, robot will stop until obstacles are removed.
Waypoints: where robot will not follow the lines and obstacles will be dynamically avoided (unless setting is toggled to stop-at-obstacle)
Trails
Teleop Trail
In this mode, users are required to Mark each point and a line will be generated between points.
Mark Trail
Similar to Teleop Trail, instead of moving the robot to mark, use the on-screen marker to drop points. Lines will be generated automatically.
The orientation is automatically defined after your next point is marked. Otherwise, use the WASD or analog controls to change the orientation
Zone
The Zone feature can automatically generate points (trail style) in a specified area.
Robot will execute generated points in trail style - obstacles will not be avoided and will follow exactly the line that is generated
You will require a minimum of 3 points to save a zone
The generated zone will look like this, where points will be generated close to each other;
Waypoints
Waypoints are similar to Mark Trail where the only difference is that the robot does not follow the generated line closely. Obstacles will be avoided as the robot navigates in its environment.
If you are only marking one point, change the orientation of the pose with either your keyboard or the analog controls
Dashboard
Dashboard is where you can see the robots operating in the environment.
Dashboard layout and its components
Map switcher. If you have more than one maps loaded, the map switcher allows you to switch views between loaded maps.
Status bar. The status bar shows the current status and current active task (if available) of the active robot.
Mode selector. The mode selector lets you switch between different modes and features of FMS, for example Drive, Localiser, Mapping, etc.
Task shortcut. Task shortcut gives you a quick access to all your tasks and lets you execute tasks quickly.
Control panel. This is the controls for the active robot. You can see the joystick and velocity settings.
Switch Active Robots
If you have more than one robots in a map, you can switch the currently-active robot by clicking on the robot icon or the "Change" button on the Control Panel. Operations (teleoperation, mapping, etc.) are done with the active robot.
Teleoperation
Teleoperation lets you drive a robot around the map with a keyboard or on-screen joystick.
Switch to "Drive" mode from the Mode Selector, then click "Start Driving" on the Control Panel.
Localisation
Sometimes the robot's localisation might produce an error in its pose estimation. To fix or relocalise the robot to the correct position, we can use the localiser tool.
Switch to "Localiser" mode from the Mode Selector, then click "Start" on the Control Panel. The laserscan should turn green.
In this mode, you can drag and rotate the robot to the correct position on the map. When you're happy with the robot's new pose, click "Localise".
The robot should now be in the correct position.
Mapping
We've covered Mapping in the guide.
Station
A station represents a fixed location or point on the map. This fixed point could be a home station, parking spot, a charging station, docking station, pick-up point, etc.
To set a station, switch to "Station" mode from Mode Selector, then click "Start" on the Control Panel.
Drive the robot to the desired station location. Then click "Set". A station is now set on the robot's current location.
You can modify the station by clicking on it. When clicking on the station, a list of options shows up.
Navigate to will send the active robot to the station.
Edit station will show a modal that lets you modify the station.
Clicking "Additional Settings" will bring you to the Map Editor and show you a more detailed station settings. Here you can also attach a custom task that will be executed after a robot navigates to the station. Custom tasks and attaching one to a station will be covered further down in the manual.
Hardware Integration
Launch the robot's motor and sensor drivers.
Run rosnode list to find the names of the ROS nodes of the drivers.
Run rosnode info <node> , where <node> is the name of the nodes determined from step 2.
Sample output:
From the information displayed from running step 3, make sure that:
The robot motor driver node subscribes to the topic /cmd_vel for velocity commands.
The Lidar driver node publishes laser data to the topic /scan
If the topic names are not set as in step 4, remap them in the launch files of the drivers by adding a line in the launch files in the following format:
While the robot base and lidar are launched, run rosrun rqt_tf_tree rqt_tf_tree and check that the frames are linked in this order:odom → base_link → laser.
If the frames of base_link and laser are not linked correctly, there are two options you can link them. You can select one of them. (Prefer use Broadcast a transformation)
Broadcast a transformation refer to this .
Create static transformation. Add the following line in the launch file of the lidar drivers:
With the driver nodes running, run RVIZ using: rosrun rviz rviz, do the following checks:
Laser data ("/scan") can be seen and is orientated in the correct direction.
Movement direction during teleoperation is correct.
Quick Start
First-time users can follow this guide.
Creating a Project
To be able to use FMS, you need to create a project. Everything in FMS (robots, maps, tasks, etc.) is organised in projects. To create a project, from the FMS application home click "Add Projects" or "Create" > "Project" from the top right.
Fill in the details then click "Submit". You then should see there's a new project on the list.
FMS Installation Guide
Supported Platforms
Platform
x86_64 / amd64
arm64 / aarch64
s390x
Queue Manager
The Queue Manager is a feature for users to;
View past, present (active) and future tasks that are queued
Re-arrange tasks (admin only)
Presently, there are 2 ways to view the Queue Manager
Windows
Installation Steps
Before you start installing RNS Plugin, it's important to note that the current main method of installing RNS Plugin is by using Docker. You'll need to install docker on your own or use our installation script.
Download the latest version and unzip/extract the folder to a preferred directory
FMS Easy Deploy contains the installation scripts and will also act as the working space for the RNS Plugin installation.
Install docker on the host machine
For windows version, please install the Docker Desktop from the Official Docker Website. Note that this will also require installing WSL2.
Run the installation script
After installing docker desktop, you can navigate to the FMS Easy Deploy directory and go to fms_easy_deploy/rns_plugin/windows/ which will contain all the necessary batch scripts. You can then just click the install.bat to run the installation batch script which will pull the Official RNS Plugin Docker Image.
Start the containers
In order to start the RNS Plugin, you can use the start script (start.bat) which will load the environment variables and run the containers based on the docker compose file.
You can also use the stop script (stop.bat) to stop the docker containers easily.
Uninstalling RNS Plugin
If you want to uninstall RNS Plugin which involves removing docker images and volumes. We provide a convenience script uninstall.bat
In “args”, x = 0.22, y = 0, z = 0.1397, yaw = 0, pitch = 0, roll = 0 for this example. This should provide a transformation between the base_link and laser frame
If you use static transformation, there will be several issues, one of the most is localizer mode, the UI won't visualize a laser scan in localizer mode.
Robot odometry ("/odom") is updating correctly during teleoperation.
Enter the project and you should be directed to the new project's dashboard.
Adding Your First Robot
Now that we have a project, let's add a robot to the project. Inside the project, under the "Robots" tab, click "Create Robot".
Fill in the details, then click "Submit".
You will get a robot key. Copy and paste this robot key to your robot's plugin. Refer to this tutorial for a quick start with RNS plugin. Now you can close the dialog.
You will see the new robot appear on the list. When the robot is connected, the connection status should turn green.
When robot is disconnected
When robot is connected
Add and Load a Map to FMS
Robots must operate within a map. For this, we need to add a map to FMS. There are several ways to add a map to FMS. We will discuss two methods: importing from file and creating a map with robot (mapping).
Adding a Map to FMS
Import a Map from File
To import a map from file, go to "Library" tab and click "Import Map from File" on the top left.
Fill in the map information and upload the files. You need both the PGM and YAML files of the map (following the ROS mapping system). Then click "Submit".
You should now see the new map on the list.
Adding a Map by Mapping
To add a new map by mapping, go to the Dashboard tab and switch the mode to manual mapping.
To begin the mapping process, click "Manual" on the control panel.
Drive the robot with keyboard or joystick.
When you're done, click "Save".
A new map will then appear on the list in "Library".
Loading a Map to Dashboard
Now we will use the map(s) that we just added into the dashboard so the robots can use it for navigation and localisation. For this, under the "Library" tab, click "Load Maps".
FMS allows multiple maps to be loaded at the same time (e.g. for multi-floor operations). Robots will be able to navigate between maps. To add a map to dashboard, click the little "+" button on the map card. Then click "Save".
If you go to the Dashboard, you should see that the maps are now visible.
Adding and Running a Task
Now that we have robots operating in a map, let's put the robot to work. We can send robots to do tasks. Let's create our first task.
Under the "Dashboard" tab, switch the mode to "Waypoint".
Add waypoints on the map by dragging across the map and clicking "Mark" where you want your waypoint to be, then click "Save". Name your waypoint.
To execute the task, click the tasks shortcut icon and choose your task.
Choose the agent to execute the task. You can also ask the FMS to automatically assign the task to any one robot. Then click "Run Now".
You shall now see that the assigned robot is executing the task.
Next Steps
Congratulations, you've executed your first task on FMS. Now let's see the other features that FMS has to offer.
✅
✅
❌
Windows
✅
✅
❌
Hardware Requirements
Before you begin, ensure that your machine fulfills the hardware requirements below:
A host machine that uses the supported platform above.
2 vCPUs or more.
4 GB or more.
Full network connectivity between all the robots that are going to be connected and the FMS (Public or Private network is fine).
Certain ports to be opened on your machine that will host the FMS, see below.
Required Ports
Please ensure that the ports below are allowed in the host machine to ensure a full working FMS.
Protocol
Direction
Port Range
Purpose
TCP
Inbound
80
FMS UI
TCP
Inbound
Licensing
FMS comes with a trial license that can be activated upon installation. After the trial license ends, you have to purchase a license to continue using the system.
Ubuntu
Method 1 : In Homepage view, by clicking the white status bar the Queue manager will appear
More than just a bar. Access the queue manager here
Only admins are able to move the sequence/priority of tasks
Method 2 : By clicking the persistent icon at the top left of the screen, if not in Homepage view
Re-arrange the order of queue list by dragging the tasks up or down
Clone Your Robot
This guide shows you how to migrate or clone your current robot images, database, and configurations of Seirios RNS to another robot.
You can migrate or close your current robot images, database, and configuration of Seirios RNS to another robot, depending on your needs.
You couldn't copy the license of your current robot and apply it to another robot, because the license is tied to one robot only. If you want to purchase the license for another robot you can reach us at [email protected] or see this page.
Backup Data
1. Backup the custom image from docker
Backing up the custom images (not the default ones) is the most important because in our cloud, we don't have any custom images of the clients, we only have the default images. Since custom images may be different for each client/robot.
Usually, the default images are named “registry.gitlab.com/<path>:<tag>”, but the custom images are usually named by adding some word behind the tag like “registry.gitlab.com/<path>:<tag>-<client>” or another name.
Check the name of your custom image on your docker-compose.yaml file,
or you can check on the docker ps (if you are already running the container):
See the image using docker image ls :
Save the docker images to a tar archive file:
docker save seirios-ros-development > ~/catkin_ws/movel_ai/seirios-ros-development.tar
Change the seirios-ros-development to your custom image name, and you can change the tar filename as well
see if the new tar file is generated
ls -sh ~/catkin_ws/movel_ai/seirios-ros-development.tar
2. Backup the default images from docker
It’s also important to back up the default images as well because if it’s not, the new PC has to download the images (it took > 6 GB) and also needs a credential key from movel.ai, you can ask the credential key to .
Otherwise, if you want to backup the default images as well, you can also backup the images using the same steps above.
3. Back up the database
You probably want to copy all the logs, maps, and some tasks that are already saved on your robot to another robot. So you don't have to do mapping and creating the tasks again.
Please follow the instructions below to back up the database:
Go inside the seirios-mongo container, and copy the db to the folder you want to save it inside the container, by executing the following command:
4. Back up the config and the ~/catkin_ws/movel_ai folder
Since we already copied the database and images to ~/catkin_ws/movel_ai folder, and the docker-compose.yaml and all the configuration files are already on ~/catkin_ws/movel_ai as well. Then the next step is you can copy all the files and folders on ~/catkin_ws/movel_ai folder.
---------------------
Restore Data
Please make sure you already install the seirios RNS, you can use for installing the seirios-RNS.
If you want to clone the seirios-RNS software with all the configs from one robot to another robot, please make sure those robot has the same configuration below:
Camera ROS topics
Dimension or Footprint of the robot
1. Restore the docker-compose and config on ~/catkin_ws/movel_ai
Please copy ~/catkin_ws/movel_ai folder from your old robot to the new robot, to restore the docker-compose.yaml and all the configurations.
2. Restore the docker image
Since we already copied the image as a tar archive file, you can load it into docker as a docker image file by executing this command:
This guide shows you how to integrate the Kudan packages into Seirios RNS.
Kudan Inc is a Japan-headquartered company focusing on artificial perception computer software by providing artificial perception solutions, such as localization and mapping software.
Kudan offers commercial-grade localization and mapping software based on SLAM technology (Simultaneous localization and mapping). This technology enables machines and devices to understand where they are, how they are moving, and the structure of their environment.
For more information, please refer to Kudan’s website, or if you want to use a Kudan as your SLAM solution for your 3D lidar, you can contact .
How to Integration the Kudan Packages into Seirios RNS
First, you have to download the Kudan ROS Packages,
If you haven't installed the Seirios RNS yet, you can download the kudan-movel easy deploy package using this (only for x86_64 architecture).
But if you already installed the Seirios RNS yet, you can contact for the link to download the Kudan Packages.
Then please make sure your seirios-ros image version is at least 2.48.9 or newer.
You can check it by executing this command:
docker ps | grep seirios-ros
And see the version on this line:
If your version is older than 2.48.9, please contact for updating the version.
1. Kudan Setup
Copy the kdlidar_ros package into the ~/catkin_ws/movel_ai/ folder
Change the permission of kdlidar_ros, so it can be executed inside the docker
chmod -R +x ~/catkin_ws/movel_ai/kdlidar_ros/
Configure tf/transform parameters in these launch files:
2. Docker Setup
Create the ros_entrypoint.sh in the ~/catkin_ws/movel_ai/ folder.
Also, change the permission of the ros_entry_point.sh by executing this command:
sudo chmod +x ~/catkin_ws/movel_ai/ros_entrypoint.sh
Edit your docker-compose.yaml file in the ~/catkin_ws/movel_ai/
3. task_supervisor Config Setup
Edit the task_supervisor.yaml (at ~/catkin_ws/movel_ai/config/task_supervisor/config/task_supervisor.yaml)
Add kudan_localization_handler to the plugins section with the following lines and comment if there's any plugin with the same type number. Example:
Add a kudan_localization_handler section with the following parameters at the end of the file:
Now you can do the 3D Mapping using Kudan Package by clicking the "Mapping" feature on Seirios RNS UI.
If you are facing any issues and have questions, please feel free to ask by reaching us at
~/movel_ws/kdlidar_ros/install/share/kdlidar_ros/launch/kdlidar_ros_pcl_localise.launch ,
Change the platform_to_lidar0_rot and platform_to_lidar0_trans based on your tf from lidar link to base_link.
~/movel_ws/kdlidar_ros/install/share/kdlidar_ros/launch/kdlidar_ros_pcl_mapping.launch,
Change the platform_to_lidar0_rot and platform_to_lidar0_trans based on your tf from lidar link to base_link.
folder.
Under the seirios-ros volumes, add the following line:
Add the following variables under the seirios-backend and seirios-frontend environment:
Seirios supports a wide range, variety, and combination of sensors on robots for various applications.
The following are sensors tried and tested with Seirios RNS on various robots types
If you do not see a familiar or preferred sensor below, benchmark against the available sensor's technical specifications. Contact us at [email protected] for further inquiries or clarifications
PC & CPU Requirements
Computers, mini PCs, and other developer boards come with either x86 or ARM64 chips. Click next to see hardware that has been tried and tested with Seirios.
Processing power is crucial to running Seirios RNS with your robot. With more sensors installed, more computing power will be required to be allocated - and less will be available for Seirios
The following are recommended PC/board specifications to take advantage of every feature available on Seirios RNS
PC with x86 processor (4 cores with 8 threads @ >3.1GhZ) OR ARM64 (8 cores) [We recommend you to use min i7 gen 8th]
8GB DDR4 RAM
256GB SSD
The following pages are specific PCs and developer boards that we have tested with Seirios RNS
x86-64 systems are widely used in most robotics systems and robots with compact-form PCs. It has high computing power and supports multiple hardware sensors connected to it.
Be sure that your robotic system has a large enough battery to accommodate its operations
PCs
Coming soon!
ARM / ARMv8-A
Seirios RNS is compatible with the following ARM-based systems and kits. ARM-based boards are power efficient but lack computing power (compared to x86-64 / AMD6 systems.
Some computing-intensive features such as 3D LiDAR mapping and navigation or multisensor support (eg 3 different sensors) will not be available on these boards.
Cameras
Cameras are crucial for navigation and localization. Some brands/models have IMU integrated for an additional dimension for precision navigation.
Omnidirectional Cameras
360° cameras are useful for many applications such as cleaning and security
LiDARs
Light Detection and Ranging (LiDAR) sensors are useful in many settings, situations, and applications. It does not rely on visual light for path planning, navigation, and localization.
Ultrasonic Sensors
Useful at short ranges, low-lying obstacles can be detected using ult
Infrared Sensors
A low-powered sensor; usually used for non-opaque obstacle detection such as glass or plastic panels
If you are unsure if your sensor(s) is/are supported, please contact us at
RNS FAQ
Mapping
Q: No map is loaded even after the successful installation of Seirios RNS
A: Use the Mapping feature to create your first map. Please refer to the in the above sections in full detail to start mapping
Q: Unable to do mapping, it stuck in loading the logo
A: Check your LiDAR data points, if the data points are above 3000, you have to downsample it.
You can downsample it by configuring your LiDAR if possible, otherwise, you can use the Laser Scan Sparsifier ROS Package.
Q: Can I continue mapping from the map?
A: Yes, please edit to your docker-compose.yaml (usually placed at ~/catkin_ws/movel_ai/), under seirios-frontend section, add this environment:
MULTI_SESSION: "true"
Q: How to do 3D Mapping?
A: Set your 3D Lidar published pointcloud topic name to /lslidar_c16/lslidar_point_cloud, make sure your 3d lidar frame is linked to parent frame base_link.
Make sure you also changed the docker-compose.yaml as well
1. Open docker-compose.yaml (usually place in ~/catkin_ws/movel_ai folder),
2. under the seirios-frontend and seirios-backend section, add these environment below: THREE_D_MAPPING: "true"
SHOW_3D_VIEW: "true"
Localization
Q: When loading the map from the Library, the status is stuck at 'Halting Localization'.
A: Loading a map from the library requires laser scan data. Check your robot is publishing laser scan data by running a rostopic echo /scan. (Replace /scan with your robot topic.)
Q: Unable to localize the map
A: Check your tf tree to make sure there is only 1 unbroken connection from map to base_link. rosrun rqt_tf_tree rqt_tf_tree.
Also, please check your AMCL node (for 2D) is running and publishing.
rosnode list | grep amcl and rosnode info /amcl.
Q: When start localization, no scan data shows on the UI
A: Check your tf, the transformations between scan tf to base_link should be not tf static. Please use broadcast a transformation instead of static transformation publisher. (see number 7 point 1 in the section.
Q: The autocorrection on the localization process seems so slow, how can I make it faster?
A: Please try to tune the parameters of the localization as well,
Follow these steps:
Navigate to the following directory in your robot's workspace: /home/<USER>/catkin_ws/movel_ai/config/movel/config/.
Navigation
Q: When start navigation, “bot faced obstacle” keep shows on the UI even on the actual environment no obstacle exist.
A: It is because the robot tracks the unknown space, the unknown space will be detected as an invalid area. You can change that by navigating to ~/catkin_ws/movel_ai/config/movel/config/costmap_common_params.yaml
set all the track_unknown_space to false
Q: I want to enable the obstacle avoidance using Trail task. But when running Trail Task, the robot failed to replan to avoid the obstacle and get back on the track.
A: Navigate to:
~/catkin_ws/movel_ai/config/task_supervisor/config/task_supervisor.yaml
under multi_floor_navigation_handler section, set the set stop_at_obstacle_override parameter to false, and restart your seirios (down the docker-compose and up -d again)
Q: How to change the Local Planner? What Local Planner fits my use case?
A: You can choose the local planner you want to use for the robot by following the steps below:
Q: I am using PebbleLocalPlanner. How to add deceleration before reach the goal, to make it smoother navigation?
A: Navigate to the this file:
~/catkin_ws/movel_ai/config/movel/config/base_local_planner_param.yaml
Under PebbleLocalPlanner section, modify these parameters below:
- decelerate_goal: falseControls whether the robot should decelerate as it approaches the goal.
-decelerate_each_waypoint: false
Determines whether the robot should decelerate when reaching each waypoint (pebble) along its path.
true: The robot decelerates at each waypoint, making navigation smoother but slower.
false: The robot maintains speed between waypoints for quicker movement.
Q: How can I make the robot navigate through narrow paths?
A: To enable your robot to navigate through narrow paths, you need to adjust the configuration settings related to obstacle avoidance. Follow these steps:
Navigate to the following directory in your robot's workspace: /home/<USER>/catkin_ws/movel_ai/config/movel/config/.
inflation_radius value set to 0.2
inflation_radius value set to 0.35
In the picture above, the red cells represent obstacles in the costmap. For the robot to avoid collision, the footprint of the robot should never intersect a red cell.
Q: How do I run my bash script through the UI?
A: You can use Aux Task, see more detail about how to create aux task in this link.
Q: I have created the aux task, but when I enable the aux task, it's still not triggering the task / bash script.A: Set your bash script become executable, by running: sudo chmod +x [file_name].sh, also please make sure that the full path will be /home/movel/.config/movel/aux_tasks/[file_name].sh (full path directory for auxiliary task inside Seirios-RNS Docker), and please make sure the script is in ~/catkin_ws/movel_ai/aux_tasks folder.
REST API
Q: How do I integrate the Seirios RNS to external system?
A: You can use our REST API.
Q: How to use MOVEL AI REST API?
A: Movel AI REST API documentation can be access on this link Swagger UI (go to http://localhost:8000/api-docs/swagger/), you can use it for reference.
Q: There's a token for each API, how do I get the token?
A: You can see the /user/token API, the value must be:
username: "admin"
password: "admin"
(if you changed the password, please use your password)
After that, it will shows the response that contains Token for authentication. You can use that token for any other API. By default, the Token will be expired within one month, you can get the update the token after get expired, or you can update it everytime the program starts, or call the function.
Q: I am going to run the task (waypoint, trail, etc), it needed id of the task, how do I get it?
A: There's an API with /<task>/all (/all suffix for everytask, such as waypoint, trail, aux task, etc), you can execute that to get all the information of the task.
Then you can find the _id, by matching your task name, you can use that id to run the task.
The Pebble Planner is a simple local planner that is designed to follow the global plan closely. Advantages of Pebble Planner include fewer configurable parameters and less oscillating motions.
How it works
Pebble Planner takes the global plan, decimates it to space out the poses as “pebbles”, then tries to reach them one by one.
It does this by rotating towards the next pebble, then accelerating until the maximum velocity is reached.
Change the parameterlocal_planner: "PebbleLocalPlanner".
Make sure you changed the parameters in both files or else an error may be thrown.
Overview of parameters
Compared to TEB, the pebble planner has fewer configurable parameters.
Configurable Parameters
Find these parameters in ~/movel/config/base_local_planner_params.yaml under the section PebbleLocalPlanner.
Can be generally classified as Probably Important, Optional, and can be Ignored.
Probably Important
robot_frame
map_frame
d_min
Defines the minimal distance between waypoints (pebbles) when decimating the global plan. This ensures that the robot’s path is simplified by reducing the number of closely spaced waypoints.
Impact:
A smaller value allows for more closely spaced waypoints, making the path smoother but potentially more complex.
A larger value reduces the number of waypoints, simplifying the path.
Unit: Meters.
allow_reverse
Determines whether the robot is allowed to move in reverse.
Impact:
True: Enables backward movement, improving flexibility and maneuverability, especially in tight spaces.
False: Disables backward motion, limiting the robot to forward-only movement, which may restrict its ability to navigate in certain situations. Recommended if your robot doesn't have sensors at the back.
acc_lim_x
The maximum linear acceleration of the robot in the x direction (forward motion).
Impact:
A higher value allows quicker acceleration.
A lower value results in smoother, more gradual acceleration.
Unit: Meters per second²
acc_lim_theta
The maximum angular acceleration of the robot (rotation speed change). The pebble planner will rotate the robot towards the next pebble, then accelerates towards it (till max speed). The planned path may be straighter if angular acceleration is lowered.
Impact:
A higher value allows for faster changes in rotational speed.
A lower value makes the robot’s rotation smoother and slower.
Unit: Radians per second² (0.785 rad/s ≈ 45 degrees per second).
Optional
xy_goal_tolerance
Specifies how close the robot needs to be to the goal’s x and y coordinates before considering the goal reached.
Impact:
A smaller value requires more precision in reaching the goal.
A larger value allows the robot to stop farther away from the exact goal position.
Unit: Meters.
yaw_goal_tolerance
Specifies the angular tolerance (yaw, or rotation around the z-axis) at the goal.
Impact:
A smaller value requires the robot to align more precisely with the goal orientation.
A larger value allows more flexibility in the robot’s final orientation.
Unit: Radians (0.3925 radians ≈ 22.5 degrees).
local_obstacle_avoidance
Whether to use Pebble Planner’s local obstacle avoidance. If set to false, and move_base’s planner_frequency is set to > 0 Hz, the global planner takes care of obstacle avoidance.
Impact:
True: The Pebble Planner will handle local obstacle avoidance, making the robot actively avoid obstacles along its path.
False: Disables local obstacle avoidance, relying on the global planner to manage obstacle avoidance based on the frequency set in move_base.
n_lookahead
How many pebbles are ahead of the active one to look ahead for obstacles. This parameter is only relevant if local_obstacle_avoidance is set to true.
Impact:
A higher value means the robot will anticipate obstacles further ahead.
A lower value limits how far the robot looks ahead for obstacles, focusing on the immediate area around the active pebble.
th_turn
The threshold angle beyond which the robot will stop and turn in place to face the next waypoint (pebble), instead of trying to turn and move at the same time.
Impact:
A lower value makes the robot attempt to turn while moving more often.
A higher value means the robot will stop and rotate in place for larger angle changes.
Unit: Radians (1.0472 rad ≈ 60 degrees).
th_reverse
The threshold angle for reversing. If the angle between the robot and the target exceeds this value, the robot will reverse instead of turning around.
Impact:
A smaller value makes the robot reverse less often.
A larger value encourages more frequent reverse movements.
Unit: Radians (2.3562 rad ≈ 135 degrees).
decelerate_goal
Controls whether the robot should decelerate as it approaches the goal.
Impact:
True: The robot slows down as it nears the goal for improved precision.
False: The robot maintains speed until it reaches the goal.
decelerate_each_waypoint
Determines whether the robot should decelerate when reaching each waypoint (pebble) along its path.
Impact:
True: The robot decelerates at each waypoint, making navigation smoother but slower.
False: The robot maintains speed between waypoints for quicker movement.
decelerate_distance
The distance from the waypoint at which the robot starts to decelerate.
Impact: Affects how early the robot starts slowing down before reaching waypoints or the goal.
Unit: Meters.
decelerate_factor
The rate at which the robot decelerates as it approaches a waypoint or goal.
Impact: A higher factor increases the rate of deceleration, while a lower factor results in more gradual deceleration.
curve_angle_tolerance
The angular tolerance allowed when following a curved path.
Impact:
A higher value allows for looser curve-following, reducing the need for sharp corrections.
A smaller value requires more precise curve-following.
Unit: Degrees.
curve_d_min
The minimum distance between waypoints (pebbles) on a curved path.
Impact:
A smaller value results in more frequent waypoints along the curve, offering finer control.
A larger value simplifies the path by reducing the number of waypoints.
Unit: Meters.
curve_vel
The speed at which the robot should travel while navigating curved paths.
Impact:
A higher value allows faster movement along curves.
A lower value ensures more controlled and precise movements.
Unit: Meters per second.
consider_circumscribed_lethal
Determines whether the circumscribed area around the robot (the area just beyond the robot’s footprint) is considered lethal (i.e., an obstacle).
Impact:
True: The circumscribed area is considered an obstacle, making the robot more conservative in its movements.
False: The circumscribed area is ignored, allowing the robot to navigate closer to obstacles.
inflation_cost_scaling_factor
The scaling factor for the cost of inflated obstacles in the costmap.
Impact:
A higher value increases the cost of cells near obstacles, forcing the robot to take wider detours.
A lower value makes the robot more willing to move closer to obstacles.
Unit: Unitless (scaling factor).
Can Be Ignored
max_vel_x, max_vel_theta - These values will be set by the UI depending on what values you give there. Can ignore it if you are using the UI.
(kp, ki, kd values) - Configurations for a differential drive.
max_vel_x
The maximum forward velocity of the robot.
Impact:
A higher value allows the robot to move faster.
A lower value limits the robot’s speed, improving safety and control.
Unit: Meters per second.
max_vel_theta
The maximum rotational velocity of the robot.
Impact:
A higher value enables faster turns.
A lower value makes the robot turn more slowly, offering smoother rotations and planned path straighter
Unit: Radians per second (0.785 rad/s ≈ 45 degrees per second).
base_local_planner_params
PebbleLocalPlanner:
 d_min: 0.30
 robot_frame: base_link
 map_frame: map
 xy_goal_tolerance: 0.15
 yaw_goal_tolerance: 0.3925
 kp_linear: 1.0
 ki_linear: 0.0
 kd_linear: 0.0
 kp_angular: 1.0
 ki_angular: 0.0
 kd_angular: 0.1
 max_vel_x: 0.3
 max_vel_theta: 0.785
 acc_lim_x: 0.5
 acc_lim_theta: 0.785
 allow_reverse: true
 th_turn: 1.0472 #1.0472 : 60 deg, how far the robot faces from the waypoint before suppressing linear motion
 local_obstacle_avoidance: true # whether to let the local planner do obsav. If false, rely on the global planner, and planning frequency must not be zero
 N_lookahead: 3 # how many multiples of d_min to look ahead when eval'ing obstacles
Open the parameter file named amcl.yaml (If amcl is current your localization algorithm).
Verify that the inflation layer is defined correctly within this file.
Try to reduce some values below:
update_min_d : Translational movement required before performing a filter update (in meters).
update_min_a : Rotational movement required before performing a filter update (in rad).
resample_interval: Number of filter updates required before resampling.
You can see more about details the parameters on this .
In the parameter file move_base_params.yaml, change the base_local_planner to the local planner that you want to use.
For my recommendation, if you want an optimal local planner and you don’t worry about the backward movement of the robot, you can go with TEB (Time Elastic Band) as your local planner.
But if you want a local planner that is designed to follow the global plan closely (which shows on the UI), you can go with Pebble Planner as your Local Planner.
You can just choose your local planner by uncommenting the line base_local_planner.
Open the parameter file named costmap_common_params.yaml.
Verify that the inflation layer is defined correctly within this file.
To facilitate navigation through narrow spaces, you'll need to reduce the inflation radius. The inflation_radius is measured in meters and determines how much the map inflates obstacle cost values. To make your robot more capable of navigating through narrow passages, consider setting the inflation_radius to a value that represents the width of your robot, plus some additional space.
By adjusting the inflation_radius parameter, you can fine-tune your robot's ability to navigate tight spaces and ensure smoother movement through narrow paths.
You can see the pictures below to explain how the inflation_radius affecting the navigation path width.
external_process_handler is a package for clients to run their own tasks into Seirios.
How to setup your tasks with External Process Handler
This guide shows you how to integrate your own programs as a plugin into Seirios using external_process_handlerpackage.
1. Install movel_seirios_message
Check your Ubuntu + ROS version.
For Ubuntu 20.04, ROS Noetic users:
Go here to download the .deb package:
Move the .deb into your home folder. Open a terminal window, run the command sudo apt install ./ros-noetic-movel-seirios-msgs_0.0.0-0focalXXX64.deb to install.
Else:
Git clone this repo here: into catkin_ws/src. Then go back to /catkin_ws to run catkin_make.
2. Integration with Seirios
You need to mount your own packages/nodes as a plugin to task_supervisor for Seirios to run it.
File to modify: ../config/task_supervisor/config/task_supervisor.yaml
Look for the plugins section in the config to add your own plugin. You can give any name and type. For type, give a number not used by previous plugins.
Then at the end of the file, create a new section with the same name you give for your plugin e.g. detecting. Then paste in the parameters.
3. Launching your nodes with Seirios
There are different ways to launch your own codes. Choose one in the below subsection that best suits you.
3.1. Launch with your own code
Start & stop
You need to write a ROS service service_start with start_handler as the callback function to start your code.
And you need another ROS service service_stop with stop_handler to stop your code. Names must be service_start and service_stop.
You must use the movel_seirios_msgs package for msg and srv.
(For ROS C++ only) Add movel_seirios_msgs to package.xml and CMakeLists.txt.
Then in task_supervisor.yaml file. Change service_req: true and service_start and service_stop params to your own topics.
Stop with topic (optional)
IF you have your own script to stop the launch.
Write a subscriber topic_process_cancel to subscribe to the UI topic. Inside the handle_publish_cancel callback, include your own codes to stop.
Then change the params topic_cancel_req: true and topic_process_cancel to your own topic.
Getting status (optional)
IF you are launching your program from a launch file. Write a publisher client_status that publishes 2 if the program runs successfully or 3 if it fails.
Then change client_status: true.
3.2. Launch from the UI
Go to Custom Task UI, and choose Seirios Engine as your Execute Engine. Similarly, you need to give a task type number that is not used by other task supervisor plugins.
Then, you will need a custom service_start_msg and/or service_stop_msg to run or stop your external process.
Input a Payload in the JSON format e.g. {“service_start_msg”: “/eg/payload/start”, “service_stop_msg”:”/eg/payload/stop”} to customize the parameters.
Payload has to be parsable in JSON format so remember the “ ”s.
detecting:
  watchdog_rate: 2.0
  watchdog_timeout: 0
  service_req: true
  launch_req: false
  service_start: "/external_process/trigger_detecting" #required if service_req is true
  service_start_msg: "" #optional  if there is any particular msg needs to sent or else empty string
  service_stop: "/external_process/stop_detecting" #required if service_req is true
  service_stop_msg: "" #optional  if there is any particular msg needs to sent or else empty string
  #launch_package: "yocs_velocity_smoother" #required if launch_req is true
  #launch_file: "standalone.launch"  #required if launch_req is true
  #launch_nodes: "/nodelet_manager /velocity_smoother" #required if launch_req is true
  topic_cancel_req: true
  topic_process_cancel: "external_process/cancel_publish"
#!/usr/bin/env python3
import rospy
from movel_seirios_msgs.srv import StringTrigger, StringTriggerResponse # like setbool
from std_msgs.msg import Bool, UInt8

class Pytest:

    def __init__(self):
        print('starting test node')
        self.node = rospy.init_node('python_test')

        self.service_start = rospy.Service('/external_process/trigger_detecting', StringTrigger, self.start_handler)
        self.service_stop = rospy.Service('/external_process/stop_detecting', StringTrigger, self.stop_handler)

        # IGNORE dummy_publisher - just to simulate UI cancel topic
        self.dummy_publisher = rospy.Publisher('/cancel_publish', Bool, queue_size=1)

        self.topic_process_cancel = rospy.Subscriber('/cancel_publish', Bool, self.handle_publish_cancel)
        self.client_status = rospy.Publisher('/external_process/client_status', UInt8, queue_size=1)

        self.flag = True

    def start_handler(self, req):
        print('inside start handler')

        start_msg = StringTriggerResponse()
        start_msg.success = True
        start_msg.message = 'starting detect'

        self.flag = True
        self.publish_client_status()

        while(self.flag):
            print('executing something')
            rospy.sleep(1)


        return start_msg # return must be [success, message format]

    def stop_handler(self, req):
        print('inside stop handler')

        self.flag = False
        print('stop handler called')
        stop_msg = StringTriggerResponse()
        stop_msg.success = False
        stop_msg.message = 'stopping detect'

        return stop_msg

    # IGNORE if you are not using a topic to stop your code
    def handle_publish_cancel(self, req):
        print("inside publish cancel", req.data)

        cancel_trigger = req.data
        if(cancel_trigger):
            print('executing cancel stuff') # replace print statement


    # IGNORE if you are not using launch files
    def publish_client_status(self):
        print("publish client status called")

        cstatus = UInt8()

        #Dummy code
        #Decide how do you determine if your launch file is successful
        #And replace the if-else statement
        if (self.flag == True):
            cstatus.data = 2 # if start_handler successfully called, task is successful and return 2
        else:
            cstatus.data = 3 # else task not successful, return 3

        self.client_status.publish(cstatus)


if __name__ == '__main__':

    py_test = Pytest()
    #py_test.publish_cancel()

    rospy.spin()
Timed Elastic Band (TEB) locally optimizes the robot's trajectory with respect to execution time, distance from obstacles and kinodynamic constraints at runtime.
How to refine teb_local_planner for navigation
This guide is for you if you choose to use teb_local_planner to navigate your robots. For more information, click here.
1. Setting up
1.1. Configure local planner
Filepath: catkin_ws/movel_ai/config/movel/config/
File to modify: base_local_planner_params.yaml
Note that config files for local planner is located in the movel package. In the yaml file itself, you see there are actually 3 local planners included. But we will only use one of them. Uncomment the entire long section under TebLocalPlannerROS.
One good practice will be to include only things you need (uncomment if previously commented) and comment out the rest.
These are the parameters that can be configured. Will explain how to tune these parameters later.
Warn: yaml forbids tabs. Do not use tabs to indent when editing yaml files. Also, check your indentations align properly.
1.2. Configure velocity setter
After configuring Seirios to use teb planner, you need to sync the velocity with maximum velocity specified by teb planner.
Check local_planner match the name of the planner in the base local planner configuration. You are configuring the maximum velocities to be the maximum velocities you specified in teb planner.
1.3. Checks
2. Localizing your robot
rviz: Use the 2D Pose Estimator tool to pinpoint the location of your robot on the map. You can use LaserScan to help you – increase the Size (m) to at least 0.05 and try to match the lines from the LaserScan as closely as possible with the map.
Seirios: Go to Localize. Use either your keyboard or the joystick button to align the laser with the map as closely as possible.
Amcl configuration file is in the same directory as base_local_planner_params.yaml.
Similarly, there are a lot of paramters in the amcl file although we are only interested in these 2 parameters:
Configure min_particles and max_particles to adjust the precision.
You can increase the values if you want a more precise localization.
However, tune the values with respects to the size of your map. Too many particles on a small map means there are redundant particles which only wastes computing power.
for more information.
2.2. Checks
3. Tuning teb_local_planner parameters
This section provides some suggestions on what values to give to the long list of parameters for TebLocalPlannerROS. Go back to the same base_local_planner_params.yaml file.
TEB requires a lot of tuning to get it to behave the way you want. Probably a lot of it is through trial and error.
For all kinds of robot tuning, always refer to the robot manufacturer’s configs. Whatever params you set must be within what that is handleable by your robot.
General tip: Make changes to only one/a few parameters at a time to observe how the robot behaves.
Tuneable parameters can be grouped into the following categories
Robot
Goal Tolerance
Trajectory
3.1. Robot
Tune robot related params with respects to the configurations specified by the manufacturer. i.e. The values set for velocity and acceleration should not exceed the robot's hardware limitations.
Kinematics
vel parameters limits how fast the robot can move. acc parameters limits how fast robot can accelerate. _x specifies linear kinematics whereas _theta specifies angular kinematics.
Footprint Model
Literally a footprint. 👣 Ideally, configure the footprint to be slightly bigger than the actual measurement of the robot. footprint_model should be configured with respects to the robot's measurements.
You must indicate the type of the robot footprint. Different types include polygon, circular, two_circles, line, point etc. For simplicity sake, footprints are usually circular or polygon. for more footprint information.
radius is required for type: "circular"
vertices is required for type: "polygon"
3.2. Goal Tolerance
Specifies how much deviation from the goal point that you are willing to tolerate.
xy_goal_tolerance is the acceptable linear distance away from the goal, in meters.
Should not set xy value too high, else the robot will stop at a very different location. However, some leeway is required to account for robot drift etc.
yaw_goal_tolerance is the deviation in the robot's orientation. i.e. Goal specifies that the robot should face directly in front of the wall but in actual, the robot faces slightly to the left.
Should not give a too tight yaw tolerance, else the robot could be jerking around just to get the orientation right. Which might not be ideal in terms of efficiency.
3.3. Obstacles
Decides how the robot should behave in front of obstacles.
Experimentation is required to tune the planner to approach obstacles optimally. A riskier configuration will allow the robot to move in obstacle ridden paths i.e. narrow corridors but it might get itself stuck around obstacles or bump into obstacles. A more conservative configuration might cause the robot to rule out its only available path because it thinks its too close to obstacles.
The tricky part is really to achieve a balance between those two scenarios.
min_obstacle_dist is the minimum distance you want to maintain away from obstacles.
inflation_dist is the buffer zone to add around obstacles.
for more information about obstacle avoidance and penalty. And for known problems with regards to obstacle avoidance tuning.
4. Tuning costmap for obstacle avoidance
Besides configuring obstacle handling behaviours in local planner, we can also configure the costmaps.
A costmap tells a robot how much does it cost to move the robot to a particular point. The higher the cost, the more the robot shouldn’t go there. Lethal obstacles that could damage the robot will have super high cost.
Filepath: catkin_ws/movel_ai/config/movel/config/
File to modify: costmap_common_params.yaml
File is in the same directory as base_local_planner_params.
There are several layers added into the costmap. Usually we follow the specifications .
footprintmust match the measurements specified in base_local_planner_params.yaml.
You can choose to add some or all of the layers in the common_costmap_params into global_costmap_params and local_costmap_params.
For the costmap layers that you have decided to use, you must mount the layers into global_costmap_params.yaml and local_costmap_params.yaml as plugins. for more information on the difference between global and local costmaps.
The most important thing in this section is to get the robot's footprint right.
Tip: Tune the teb_local_planner params first. Modify the costmap only if you need more fine tuning after that.
4.1. Inflation Layer
This layer inflates the margin around lethal obstacles and specifies how much bigger you want to inflate the obstacles by.
inflation_radius is the radius, in meters, to which the map inflates obstacle cost value. Usually it is the width of the bot, plus some extra space.
cost_scaling_factors is the scaling factor to apply to cost values during inflation.
Additional information to configure it correctly (directly lifted from )
The inflation_radius is actually the radius to which the cost scaling function is applied, not a parameter of the cost scaling function. Inside the inflation radius, the cost scaling function is applied, but outside the inflation radius, the cost of a cell is not inflated using the cost function.
You'll have to make sure to set the inflation radius large enough that it includes the distance you need the cost function to be applied out to, as anything outside the inflation_radius will not have the cost function applied.
For the correct cost_scaling_factor, solve the equation there ( exp(-1.0 * cost_scaling_factor * (distance_from_obstacle - inscribed_radius)) * (costmap_2d::INSCRIBED_INFLATED_OBSTACLE - 1)), using your distance from obstacle and the cost value you want that cell to have.
Ideally, we want to set these two parameters such that the inflation layer almost covers the corridors. And the robot is moving in the center between the obstacles. (See figure below)
4.2. Obstacle Layer
The obstacle layer marks out obstacles on the costmap. It tracks the obstacles as registered by sensor data.
For 2D mapping, laser_scan_sensor must be selected.
obstacle_range is the maximum distance from the robot that an obstacle will be inserted into the costmap. A value of 10 means the costmap will mark out obstacles that are within 10 meters from the robot.
raytrace_range is the range in meters at which to raytrace out obstacles. The value must be set with respects to your sensors.
max_obstacle_height is the maximum height of obstacles to be added to the costmap. Increase this number if you have very tall obstacles. The value must be set with respects to your sensors.
Voxel layer parameters
Voxels are 3D cubes that has a relative position in space. Can be used for 3D reconstruction with depth cameras. Ignore the parameters below if you are not using 3D. More information .
origin_z is the z-origin of the map (meters)
z_resolution is the height of the cube
z_resolution controls how dense the voxels is on the z-axis. If it is higher, the voxel layers are denser. If the value is too low (e.g. 0.01), you won’t get useful costmap information. If you set z resolution to a higher value, your intention should be to obtain obstacles better, therefore you need to increase z_voxels parameter which controls how many voxels in each vertical column. It is also useless if you have too many voxels in a column but not enough resolution, because each vertical column has a limit in height.
z_voxels is the number of voxels
4.3. lowbstacle layer
Low obstacle layer is obstacle layer, but with additional parameters. Change your observation_sources to the topic that you want to take in data from.
Use obs_cloud if you want a PointCloud (3D) or mock_scan if you want a LaserScan (2D). Or you can specify your own method.
There are only two important parameters to note.
min_obstacle_height is the height of the obstacle below the base of the robot. Examples includes stairs. Specify this param so that the robot can detect obstacles below its base link and prevent it from falling into the pit...
max_obstacle_height is the maximum height of obstacle. It is usually specified as the height of the robot.
5. Uncomfortable situations
You WILL definitely be encountering some of the issues. Because param tuning requires experimentation, it is suggested you test out your values in the console first before modifying the yaml files.
rosrun rqt_reconfigure rqt_reconfigure
List of known issues and possible fixes is not exhaustive. There will be many more issues yet to be encountered when extensively using the robot. Thus it is good practice to keep a list of problems and solutions so you know how to deal with the problem should it come up again.
5.1. Some known uncomfortable situations
Issue #1: Problems getting the robot to go to the other side of the narrow path.
It is noted from observations that the robot will be returning goal failure, or that robot will get itself uncomfortably close to walls and get stuck there.
Issue #2: Problems getting the robot to turn 90 degrees.
The planner somehow disregards the wall and direct the robot to go through it instead of making a 90 degree turn around the wall. Though it seems most robots are smart enough to recognize they cannot go through walls and will either abort the goal or get stuck trying.
5.2. Some attempted fix
Solution #1: Reducing the velocity and acceleration. The intuition is that by slowing down the movement and rotation of the robot, the planner might have more time to react to the obstacle and plan accordingly.
Solution #2: (For robots that refuse to go to the other side of the corridor.)
Shrink the inflation_radiusin both costmaps so that it does not cover the corridor. (Right figure) Noted with observation that if the radius covers the entire corridor, robot may refuse to move.
Check that the robot's footprint size is correct and check that the costmaps aren't blocking the paths.
References
External resources if you need more information about planners and tuning planners.
 footprint_model: # types: "point", "circular", "two_circles", "line", "polygon"
    type: "polygon" #"circular"
    radius: 0.38 # for type "circular"
    #line_start: [-0.3, 0.0] # for type "line"
    #line_end: [0.3, 0.0] # for type "line"
    #front_offset: 0.2 # for type "two_circles"
    #front_radius: 0.2 # for type "two_circles"
    #rear_offset: 0.2 # for type "two_circles"
    #rear_radius: 0.2 # for type "two_circles"
    vertices: [ [0.26, 0.26], [0.26, -0.26], [-0.26, -0.26], [-0.26,0.26] ]   # for type "polygon"
Image from https://kaiyuzheng.me/documents/navguide.pdf (Pg 12)
This is the reason why we need a min_obstacle_height.
left: inflation_radius covering corridor; robot refuses to move
right: cleared inflation_radius
TebLocalPlannerROS:odom_topic:/odom #odom_topic: /rtabmap/odommap_frame:map # Trajectoryteb_autosize:Truedt_ref:0.3#0.2dt_hysteresis:0.1global_plan_overwrite_orientation:Truemax_global_plan_lookahead_dist:3.0feasibility_check_no_poses:5 # Robotmax_vel_x:0.40#0.25 max_vel_x_backwards:0.4#0.2max_vel_theta:1.0#0.5acc_lim_x:0.5# 0.2acc_lim_theta:0.6283#0.5, 0.26min_turning_radius:0.0footprint_model:# types: "point", "circular", "two_circles", "line", "polygon"type:"polygon"#"circular" radius:0.38# for type "circular" #line_start: [-0.3, 0.0] # for type "line" #line_end: [0.3, 0.0] # for type "line" #front_offset: 0.2 # for type "two_circles" #front_radius: 0.2 # for type "two_circles" #rear_offset: 0.2 # for type "two_circles" #rear_radius: 0.2 # for type "two_circles"vertices:[[0.26,0.26],[0.26,-0.26],[-0.26 # GoalTolerancexy_goal_tolerance:0.2#0.2yaw_goal_tolerance:0.1571free_goal_vel:False # Obstaclesmin_obstacle_dist:0.05inflation_dist:0.0dynamic_obstacle_inflation_dist:0.05include_costmap_obstacles:Truecostmap_obstacles_behind_robot_dist:0.1obstacle_poses_affected:25#30costmap_converter_plugin:""costmap_converter_spin_thread:Truecostmap_converter_rate:5 # Optimizationno_inner_iterations:5#5no_outer_iterations:4#4optimization_activate:Trueoptimization_verbose:Falsepenalty_epsilon:0.1weight_max_vel_x:2#2weight_max_vel_theta:1#1weight_acc_lim_x:1# 1weight_acc_lim_theta:1# 1weight_kinematics_nh:1000#1000weight_kinematics_forward_drive:1000#1000weight_kinematics_turning_radius:1#1 #only for car-like robotsweight_optimaltime:1.0#1weight_obstacle:50#50weight_viapoint:5.0#5.0 #1.0weight_inflation:0.1#0.1weight_dynamic_obstacle:10# not in use yetselection_alternative_time_cost:False# not in use yet # Homotopy Class Plannerenable_homotopy_class_planning:False#Trueenable_multithreading:Truesimple_exploration:Falsemax_number_classes:2#4roadmap_graph_no_samples:15roadmap_graph_area_width:5h_signature_prescaler:0.5h_signature_threshold:0.1obstacle_keypoint_offset:0.1obstacle_heading_threshold:0.45visualize_hc_graph:False #ViaPointsglobal_plan_viapoint_sep:0.5#negative if nonevia_points_ordered:False#adhere to order of via points #Feedbackpublish_feedback:true#false


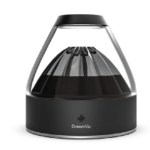

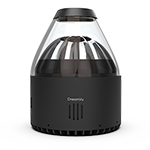

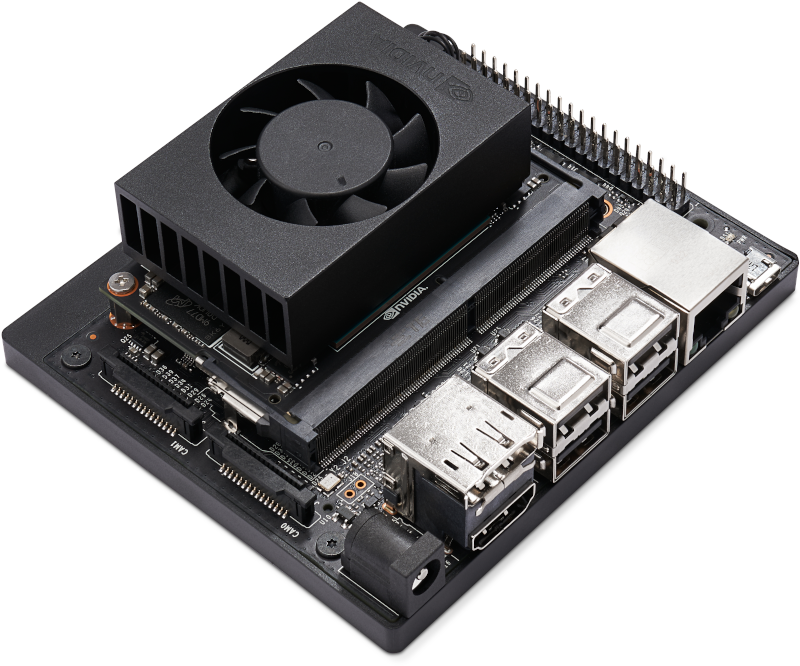


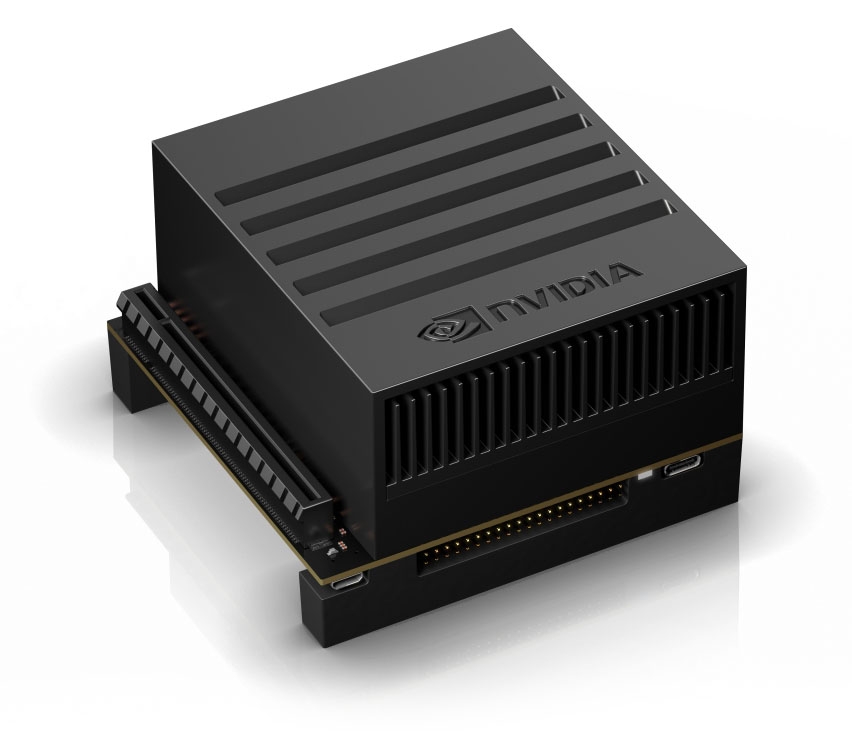


